 judy
judyMaking wine at home in a 5-gallon batch is the ideal starting point for home winemakers, producing approximately 25 bottles of finished wine over six to twelve weeks. Whether you’re experimenting with classic grape varieties, fruit wines, or mead, the 5-gallon carboy has become the standard vessel for good reason: it provides the perfect balance between manageable quantity and proper fermentation conditions while giving you enough bottles to refine your technique and share your creations.
I’m Jane Calona, and I’ve guided countless winemakers through their first batches and beyond. The beauty of 5-gallon recipes lies in their scalability and forgivingness. You’re working with enough volume that minor measuring errors won’t ruin your batch, yet you’re not so committed that a failed experiment feels devastating. This batch size also fits standard equipment perfectly, from primary fermentation buckets to glass carboys, making the wine at home basics accessible without a huge upfront investment.
The recipes ahead cover everything from traditional red and white grape wines to adventurous fruit wines and honey-based meads. Each follows the same fundamental fermentation principles while offering distinct flavor profiles and aging requirements. You’ll learn not just what to mix, but why each ingredient matters and how to adjust recipes to match your taste preferences. By the end of your first 5-gallon batch, you’ll understand the transformation from raw ingredients to finished wine in a way that no store-bought bottle can teach you.
Essential Equipment and Materials for 5-Gallon Wine Batches
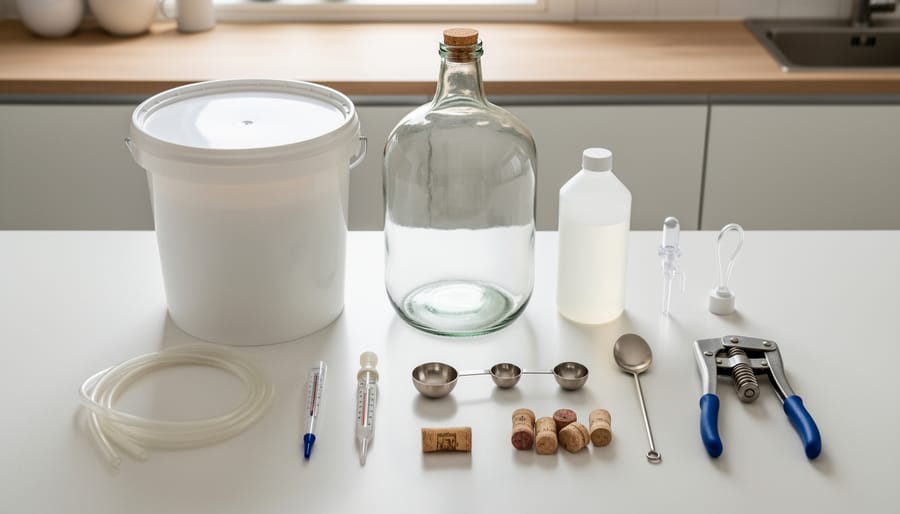
Before you can craft your first 5-gallon batch, you need the right tools. The good news is that beginner winemaking requires a modest investment, and most equipment lasts years with proper care. Jane Calona recommends starting with essentials and adding specialized tools as you refine your technique.
Your core equipment list includes:
- Primary fermentation bucket (6.5-gallon food-grade plastic bucket with lid), provides room for vigorous early fermentation
- Glass carboy (5-gallon), for secondary fermentation and clarification where you can monitor progress
- Airlock and rubber stopper, allows CO2 to escape while preventing oxygen and contaminants from entering
- Auto-siphon and tubing (3/8-inch food-grade), transfers wine between vessels without disturbing sediment
- Hydrometer with test jar, measures sugar content and tracks fermentation progress to completion
- Sanitizer (Star San or similar no-rinse product), the single most critical item for preventing spoilage
- Wine bottles (25 standard 750ml) and corks, for your finished product
- Hand corker or floor corker, seals bottles properly for aging and storage
Beyond these must-haves, Jane suggests a long-handled spoon for stirring, a bottle filler attachment for clean bottling, and a thermometer strip that adheres to your fermentation vessel. These small additions make the process smoother without breaking your budget.
You can source quality equipment from homebrew supply stores, both local and online. Starter kits often bundle the basics at a discount, typically running between 80 and 150 dollars for everything you need. Jane notes that glass carboys, while heavier and more fragile than plastic, give you a clear view of fermentation and clarification, making them worth the extra caution for most winemakers.
Skip expensive upgrades like pH meters and refractometers until you have several batches under your belt. A basic hydrometer will serve you perfectly well as you learn. Invest your money where it matters most: a reliable auto-siphon prevents oxidation, and quality sanitizer prevents 90 percent of winemaking failures. The rest you can acquire gradually as your skills and ambitions grow.
Safety and Sanitation: Critical Guidelines Before You Begin
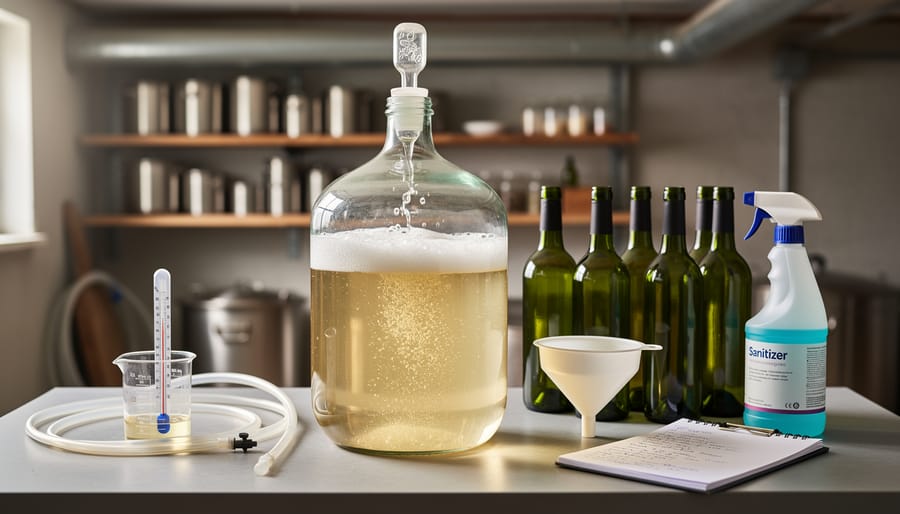
Before you gather ingredients or open a single bottle, understand this: cleanliness determines whether you’ll pour a delicious wine or dump a foul-smelling mess down the drain. Jane Calona has witnessed countless batches ruined not by poor recipes or cheap ingredients, but by a quick rinse instead of proper sanitization. Every surface that touches your wine, fermentation buckets, airlocks, siphon tubes, stirring spoons, even your hands, can harbor wild yeasts, bacteria, and mold spores that will eagerly compete with your chosen yeast strain.
Use a no-rinse sanitizer like Star San or potassium metabisulfite solution, following the manufacturer’s dilution ratios precisely. Submerge equipment completely for the recommended contact time, typically two minutes, then let it drip dry rather than wiping with a potentially dirty towel. Sanitize immediately before use, not hours in advance, because equipment left sitting can collect airborne contaminants.
Glass carboys demand special caution. They’re heavy when full, a 5-gallon carboy weighs over 50 pounds with wine, and they shatter catastrophically if dropped or knocked against hard surfaces. Always carry them in a plastic milk crate or with a carboy handle, never by the neck alone. When adding hot water or sanitizer, pour gently; sudden temperature changes can crack the glass.
During fermentation, pressure builds inside your vessel. Never seal a fermenter completely without an airlock, or you risk an explosion. Similarly, avoid peering directly over an actively fermenting batch; carbon dioxide sinks and displaces oxygen, causing dizziness if you breathe it in concentrated amounts.
Finally, remember that you’re creating alcohol, which carries its own responsibilities. Store fermenting wine away from children and pets, label everything clearly with contents and dates, and consume responsibly once your batch is ready.
Five Beginner-Friendly 5-Gallon Wine Recipes
Classic Red Grape Wine (Cabernet or Merlot Style)
A traditional red grape wine remains one of the most satisfying 5-gallon wine recipes for home winemakers. For a Cabernet or Merlot style, you’ll need 15-18 pounds of fresh red grapes or four 46-ounce cans of red grape juice concentrate, 2-3 pounds of sugar (adjusted based on initial gravity readings), wine yeast suitable for red wines (such as Lalvin RC212 or EC-1118), yeast nutrient, pectic enzyme, and potassium metabisulfite for sanitizing. If using fresh grapes, crush them thoroughly and let them macerate with their skins for 5-7 days during primary fermentation to extract color, tannins, and body. Concentrate offers a simpler step-by-step process while still producing quality results. Expect a full-bodied wine with dark fruit flavors and moderate tannins. This style benefits significantly from aging, at least three months in the carboy after fermentation completes, then another three to six months in the bottle before drinking. The result is a smooth, complex red wine that rivals many commercial options.
Crisp White Wine (Chardonnay or Sauvignon Blanc Style)
White wine demands cooler fermentation than reds to preserve delicate fruit aromas and crisp acidity. For a 5-gallon batch, start with 5 gallons of quality white grape juice concentrate (Chardonnay or Sauvignon Blanc varieties work beautifully) or 60-70 pounds of fresh white grapes if you’re crushing your own.
Mix your juice with 10-12 pounds of corn sugar or dextrose, depending on your target alcohol level, most home winemakers aim for 11-13% ABV. Add 2.5 teaspoons of yeast nutrient and 1.25 teaspoons of pectic enzyme to ensure a clean fermentation and brilliant clarity.
For yeast, Jane recommends Lalvin EC-1118 for beginners because it’s nearly foolproof and ferments clean at various temperatures. If you want more fruit-forward character, try Lalvin 71B-1122, which softens acids and brings out tropical notes. Advanced winemakers might choose Red Star Côte des Blancs for a slower, more aromatic fermentation.
Temperature control makes or breaks white wine. Keep your fermenting carboy between 55-65°F throughout primary and secondary fermentation, warmer temps create fusels and erase the crisp character you’re after. A cool basement or temperature-controlled fermentation chamber works perfectly. White wines typically finish primary in 7-10 days and need 4-6 weeks in secondary before they’re ready to bottle.
Berry Wine (Strawberry, Blueberry, or Mixed Berry)
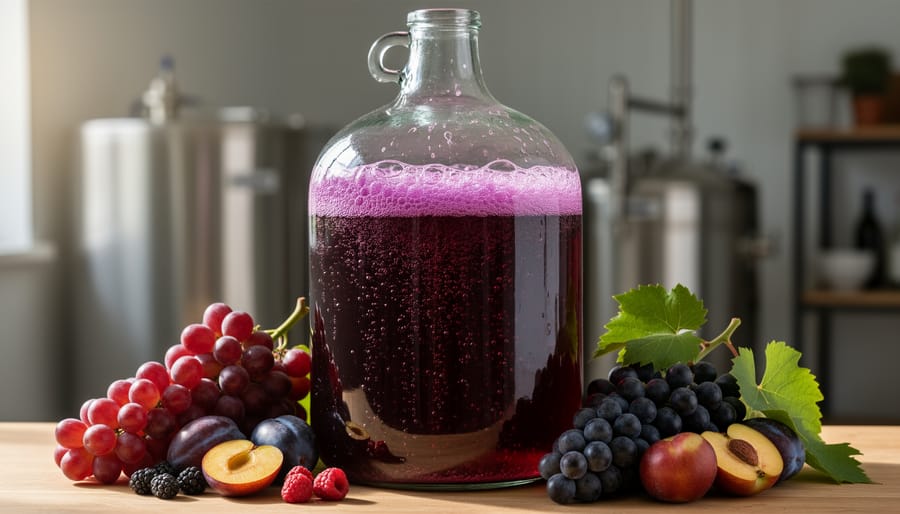
Berry wine delivers bright, approachable flavors and forgives minor missteps, making it an excellent first project. Strawberries, blueberries, or a mixed-berry blend all work beautifully in a 5-gallon recipe.
Start with 12-15 pounds of fresh or frozen berries. Frozen fruit is actually easier for beginners because freezing breaks down cell walls and releases juice more readily. Crush the berries gently in a sanitized bucket, then add 3 gallons of water and 10-12 pounds of sugar (adjust based on the fruit’s natural sweetness and your taste preference). Berries are often low in acid, so add 2 tablespoons of acid blend to brighten the flavor and prevent a flat, cloying finish.
Pitch your yeast, Lalvin 71B handles berry tannins particularly well, and ferment at 68-72°F. The thick fruit pulp will float during primary fermentation; stir it down once daily to extract color and flavor. After 5-7 days, strain out the solids and rack to secondary.
Berry wines typically finish semi-sweet to balance the fruit’s natural tartness. After stabilization, taste and back-sweeten if needed with simple syrup dissolved in a small amount of wine, adding incrementally until you reach the sweetness level you want. Age for 3-6 months before bottling for the best integration of flavors.
Apple or Pear Wine
This 5-gallon recipe produces a clean, crisp wine reminiscent of hard cider but with more body and depth. You’ll need 4-5 gallons of fresh-pressed apple or pear juice (or a mix of both), 2-3 pounds of sugar depending on the juice’s natural sweetness, and a champagne yeast like EC-1118 for a dry finish or 71B-1122 for slightly sweeter character.
Start by warming the juice to room temperature and checking the specific gravity, aim for 1.085 to 1.095. Most store-bought juices need added sugar to reach this target. Avoid juice with preservatives like potassium sorbate, which will prevent fermentation. If using fresh-pressed fruit, let the juice settle overnight and rack off the sediment before pitching yeast.
Primary fermentation takes about a week at 60-65°F. Cooler temperatures preserve the delicate fruit aromatics that define good apple or pear wine. After racking to secondary, age for at least two months, longer for pear, which benefits from smoothing out over three to four months.
The result should taste crisp and fruity without cloying sweetness. If the finish feels thin, add 4 ounces of glycerin during stabilization to improve mouthfeel without adding sugar. Backsweeten cautiously if desired, just half a cup of dissolved sugar per gallon transforms a bone-dry wine into something more approachable.
Tropical Wine (Pineapple or Mango)
Tropical fruits bring vibrant, exotic flavors to your 5-gallon wine batch that surprise guests and showcase just how creative home winemaking can be. Pineapple and mango both produce wines with bright aromatics and a refreshing finish, but their high sugar content and lower acidity require careful balancing.
For a 5-gallon pineapple wine, you’ll need about 15 pounds of fresh pineapple (or 1.5 gallons of pure pineapple juice without preservatives). Mango wine typically requires 18-20 pounds of ripe mangoes. Both fruits contain enough natural sugar to reach 10-12% alcohol, but you’ll likely need to add 2-4 pounds of cane sugar to hit your target starting gravity of 1.085-1.095.
The challenge with tropical wines is acid balance. Pineapple has decent acidity naturally, but mango can taste flat and cloying without adjustment. Add acid blend in small increments (start with 2 teaspoons per gallon, then taste) until the must has a pleasant tartness, think lemonade, not fruit punch. Use Champagne yeast (EC-1118) for clean fermentation that lets the fruit shine through.
Tropical wines ferment quickly due to high sugar content and typically finish primary in 7-10 days. Age for at least three months before bottling to let the bright fruit flavors mellow and integrate.
The Complete Winemaking Process: From Juice to Bottle
Step 1: Preparing Your Ingredients and Must
The first step to any successful 5-gallon wine batch is building a clean, well-balanced must, the mixture of juice, water, sugar, and additives that will become your wine. Start by sanitizing your primary fermenter, stirring spoon, hydrometer, and any other equipment that will touch your ingredients.
If you’re using fresh fruit, crush or chop it thoroughly to maximize juice extraction. For a 5-gallon batch, you’ll typically need 12-15 pounds of fruit, depending on variety and desired body. Strain out large seeds or stems. Juice concentrate makes this easier, follow package instructions for dilution, usually one gallon of concentrate plus water to reach five gallons total volume.
Next, measure your must’s specific gravity with a hydrometer. Most wine recipes target an initial reading between 1.085 and 1.095, which translates to roughly 11-13% alcohol after fermentation. If your reading is low, dissolve cane sugar or corn sugar into warm water and stir it into the must. Add sugar gradually, about half a pound at a time, checking the gravity after each addition until you hit your target.
Acidity matters just as much. Use pH strips or a meter to test; aim for 3.2-3.6 for balanced flavor. If your must is too acidic, add a small amount of potassium carbonate. If it’s too flat, blend in acid blend powder, available at homebrew shops.
Once your gravity and pH are dialed in, you’ve created a must ready for yeast.
Step 2: Adding Yeast and Starting Fermentation
With your must prepared and measured, it’s time to introduce the catalyst that transforms juice into wine: yeast. This step sets the entire fermentation in motion, so getting it right matters.
Start by rehydrating your wine yeast according to the packet instructions, typically, sprinkle the yeast over 100ml of warm water (95-105°F) and let it sit for 15 minutes. This gentle wake-up process ensures the yeast cells are active and ready to work. Stir gently, then pitch the rehydrated yeast directly into your 5-gallon must, stirring thoroughly to distribute it evenly.
Temperature control is critical now. Keep your fermenting vessel between 65-75°F for most wine yeasts, cooler for whites, slightly warmer for reds. Within 12 to 48 hours, you should see signs of life: small bubbles rising, a foamy cap forming on the surface, and the airlock beginning to bubble steadily. If your airlock is bubbling every few seconds and you see active foam, fermentation has taken hold.
Don’t panic if nothing happens in the first 24 hours; different yeasts activate at different speeds. But if you hit 48 hours with no activity, check your temperature and consider repitching fresh yeast. Once fermentation is visibly underway, resist the urge to open the vessel frequently, let the yeast do its work undisturbed.
Step 3: Primary Fermentation Monitoring
Primary fermentation is where the magic happens, and where your attention matters most. For the first 24 to 48 hours after pitching yeast, you’ll see vigorous bubbling through the airlock as the yeast consumes sugars and releases carbon dioxide. This active phase typically lasts five to ten days, depending on temperature and yeast strain.
Take your first hydrometer reading 24 hours after pitching to establish a baseline, then check every two to three days. You’re watching the specific gravity drop from around 1.090 down toward 1.010 or lower. Each reading shows how much sugar remains. Keep fermentation temperatures steady between 65°F and 75°F for most wines, cooler for whites, slightly warmer for reds.
If bubbling slows dramatically before reaching your target gravity, you might have sluggish fermentation. Gently swirl the carboy to rouse the yeast, check the temperature (cold slows everything down), and ensure enough nutrients are present. A truly stuck fermentation, where gravity stays unchanged for three days, may need fresh yeast or professional troubleshooting.
You’re ready to rack to secondary when bubbling drops to one bubble per minute or slower and two consecutive hydrometer readings 24 hours apart show no change. This usually happens around day seven to ten. Don’t rush it, moving too early leaves excess sediment that clouds your finished wine.
Step 4: Racking to Secondary Fermentation
After 5-10 days, when your hydrometer reads between 1.020 and 1.030 and fermentation activity has noticeably slowed, it’s time to rack your wine off the sediment (called “lees”) that has settled at the bottom. This dead yeast and fruit solids can create off-flavors if left too long.
Start by sanitizing your clean 5-gallon carboy and all equipment. Position your primary fermenter higher than the secondary carboy so gravity assists the flow. Insert your racking cane or auto-siphon into the wine, keeping the intake at least an inch above the sediment layer. Begin siphoning slowly to avoid splashing, which introduces oxygen and can spoil your wine.
As you transfer, watch the liquid in your primary vessel. Stop when you’re within an inch of the sediment, losing a bit of wine is better than transferring sludge. You should transfer roughly 4.5-4.75 gallons of relatively clear wine into your clean carboy.
Immediately fit a sanitized airlock filled with water or sanitizer solution to the carboy’s stopper. The airlock allows carbon dioxide to escape while keeping oxygen and contaminants out.
Now secondary fermentation begins, a much gentler phase lasting 3-4 weeks. Fermentation continues at a slower pace, clarifying the wine as remaining sediment settles. Store your carboy in a cool, stable location around 60-70°F. Check weekly to ensure the airlock stays filled and note how the wine gradually clears.
Step 5: Clarification and Stabilization
After secondary fermentation completes, your wine likely appears hazy with suspended yeast and fruit particles. Allow the wine to sit undisturbed for an additional week, many wines clear naturally without intervention as particles settle to the bottom of the carboy.
If cloudiness persists, consider a fining agent. Bentonite works well for white wines, while Sparkolloid suits reds and fruit wines. Follow package instructions carefully, as overdosing can strip flavor. Mix the fining agent with warm water, stir it gently into your wine, and wait 5-7 days for it to draw particles down.
Stabilization prevents refermentation in the bottle. Add potassium sorbate (1/2 teaspoon per gallon) and potassium metabisulfite (1/4 teaspoon per gallon) to your 5-gallon batch. These chemicals halt yeast activity and protect against oxidation and spoilage. Stir gently to distribute evenly, avoiding splashing that introduces oxygen.
Wait at least two weeks after stabilizing before bottling. This patience ensures clarity and prevents sediment from forming in your finished bottles.
Step 6: Bottling Your 5-Gallon Batch
After your wine has cleared and stabilized, it’s time to bottle your 5-gallon batch, which yields approximately 25 standard 750ml bottles. Start by sanitizing all bottles, corks, and your siphon equipment thoroughly. Position your carboy above your bottling area and use your auto-siphon to transfer wine directly into each bottle, filling to within an inch of where the cork will sit. This leaves proper headspace and prevents oxidation.
Cork each bottle immediately after filling using a hand corker or floor corker (floor models provide more consistent seals). Insert corks straight and fully, they should sit flush with the bottle rim. Store bottles upright for three days to let corks expand and seal properly, then lay them on their sides to keep corks moist.
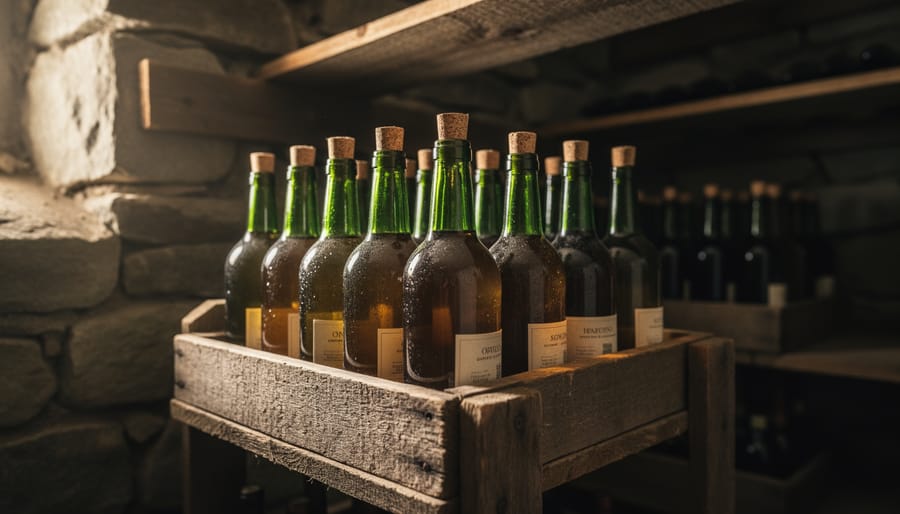
Label each bottle with the wine type, ingredients, and bottling date. Most wines improve with at least three months of bottle aging, though reds often benefit from six months to a year. Store in a cool, dark space with minimal temperature fluctuation, 55-65°F is ideal.
Testing Your Wine and Knowing When It’s Ready
Knowing when your 5-gallon batch is truly ready requires more than guesswork. Start with your hydrometer: take a gravity reading three days apart. If both readings match and hover around 0.990-0.998 for dry wines (or your target final gravity for sweeter styles), fermentation has finished. A stable reading confirms the yeast has consumed all available sugar and won’t cause bottle bombs later.
Taste your wine, but manage expectations. Young wine often tastes harsh, acidic, or flat before aging smooths rough edges. You’re checking for obvious flaws, vinegar tang, rotten egg sulfur, or medicinal off-flavors, not perfection. If something tastes seriously wrong, consult troubleshooting tips before bottling.
Clarity matters too. Hold your carboy up to light; you should see through the wine with minimal haze. Persistent cloudiness after stabilization may need fining agents or more settling time. Don’t rush, patience pays off in the glass.
Aging recommendations vary by style. Light fruit wines can shine after just two months in the bottle, while red grape wines typically need six months to a year before their tannins mellow and flavors integrate. White wines generally peak within three to six months. Mark your bottles with the date and resist opening them too early.
If results disappoint, don’t get discouraged. Your first batch teaches you what to adjust next time, temperature control, ingredient quality, or fermentation timing. Every winemaker improves through practice. Keep detailed notes on gravity readings, dates, and observations so each batch builds on the last one’s lessons.
Common Questions About 5-Gallon Wine Recipes
How long does it take to make a 5-gallon batch of wine?
From start to bottling, expect 6-12 weeks depending on the recipe and style. Primary fermentation runs 5-10 days, secondary fermentation takes 3-4 weeks, and clarification adds another 2-4 weeks. Reds benefit from additional aging in the bottle for 3-6 months, while fruit wines can be enjoyed sooner.
Can I use frozen fruit instead of fresh?
Absolutely. Frozen fruit actually works beautifully because freezing breaks down cell walls, releasing more juice and flavor. Thaw completely before use and include any released liquid in your must. The results often match or exceed fresh fruit.
Why did my fermentation stop before reaching the target gravity?
Stuck fermentation usually stems from temperature issues (too cold or too hot), nutrient deficiency, or stressed yeast. Try warming the carboy to 70-75°F, add yeast nutrient, and gently swirl to rouse the yeast. If that fails after 48 hours, you may need to pitch fresh yeast.
What does it cost to make 5 gallons of wine at home?
After initial equipment investment (roughly $75-150 for basics), each 5-gallon batch costs $30-60 depending on ingredients. Grape juice concentrate runs cheapest at $25-35 per batch, while fresh grapes or premium fruit can push costs to $50-60. You’ll get about 25 bottles, making each bottle $1.20-2.40.
Can I substitute honey for sugar in these recipes?
Yes, but adjust carefully since honey adds distinct flavor and ferments differently than table sugar. Use about 25% less honey by weight than the sugar called for, and expect a richer, slightly different character in your finished wine.
How do I scale a 5-gallon recipe up to 6 gallons or down to 1 gallon?
Multiply or divide all ingredients proportionally. For 6 gallons, multiply by 1.2. For 1 gallon, divide by 5. Keep yeast packets the same for batches 1-6 gallons since one packet handles that range easily.
How long can I store wine before bottling?
You can keep wine in a carboy under airlock for several months if needed, though it’s best to bottle within 3-4 months of finishing fermentation. Extended carboy storage risks oxidation if the airlock dries out or seals fail.
My wine tastes harsh or acidic. Can I fix it?
Harshness often mellows with age, so patience helps. For excessive acidity, you can add potassium carbonate in small increments (follow package directions), testing after each addition. For tannic harshness in red wines, aging for 6-12 months makes a dramatic difference.
Jane emphasizes that most winemaking problems have straightforward solutions once you understand the cause. Temperature control prevents the majority of fermentation issues, while proper sanitation eliminates most spoilage risks. If a batch goes wrong despite your best efforts, treat it as a learning experience rather than a failure.
Storage questions come up frequently. Once bottled, store your wine horizontally in a cool, dark place with stable temperatures between 55-65°F. A basement or closet works perfectly. The horizontal position keeps corks moist and prevents air seepage. Most fruit wines hit their peak within 6-12 months, while grape wines improve for 1-3 years depending on style.
For ingredient substitutions beyond those covered in the FAQ, remember that winemaking is flexible within reason. Different fruit varieties within the same family (various apple types, different berries) work interchangeably with minor adjustments to sugar and acid. Switching between yeast strains affects flavor profile but rarely causes failure. What you cannot freely substitute are the sanitizers, stabilizers, and fermentation nutrients, which serve specific chemical purposes.
Making wine in 5-gallon batches is genuinely manageable, even if you’ve never fermented anything before. You’ve got the recipes, the equipment list, and the step-by-step process, everything you need to fill 25 bottles with something you crafted yourself.
Start simple. The berry or apple recipes are forgiving and deliver satisfying results quickly. Your first batch might not be perfect, and that’s fine. Each time you make wine, you’ll get sharper at reading fermentation, adjusting flavors, and timing your racking. The learning curve is part of the experience, not a barrier.
Jane’s been making wine for years, and she’ll tell you the best part isn’t just the final glass. It’s uncorking a bottle you made six months ago and watching friends react when you tell them it’s yours. That moment makes every step worthwhile.
Ready to keep learning? Calana’s Wine Making Guides cover everything from ingredient sourcing to advanced techniques, so you can keep building your skills and confidence with every batch.